N.B! Some of the buttons in the pictures are visible only on the planner's or the administrator's desktop!
Create a reservation
- Add a reservation in the Make other reservation field.
- Move to the date and time you wish to make a reservation.
- Select the time slot you want to book in the calendar.
Conflicts
Further instructions
1. Start the reservation by selecting the resources you want to book. When searching for a room, just type in the 3 first letters of the room type (aud -> auditorium) and the system will start searching for rooms in that category.
2. Select the date and time you wish to book in the calendar. Change the view or use the Move to date function for an easier booking.
3. Paint the time slot you want to book. The selection will show in light blue.
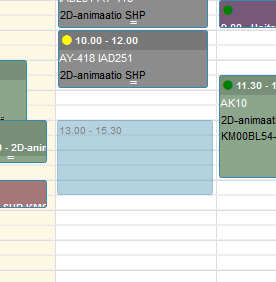
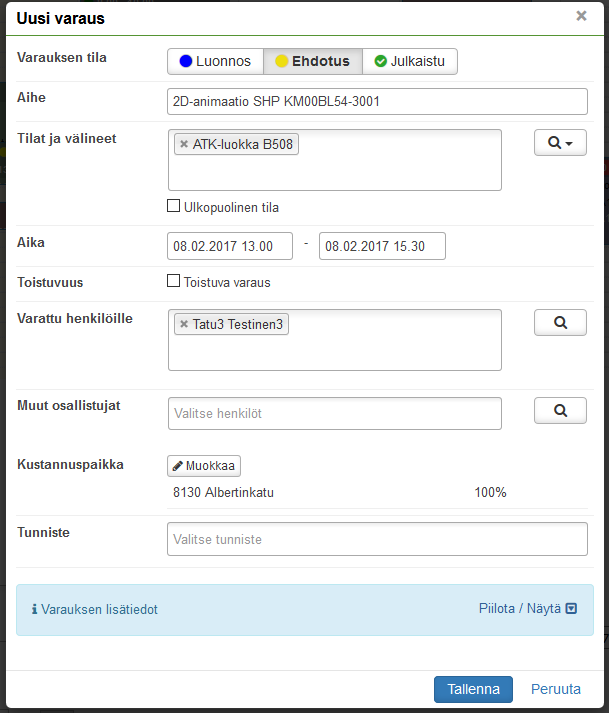
4. A new reservation form opens. Fill out the necessary information. Please note the status of the reservation: Draft (blue), Proposal (yellow) and Published (green). These colours will also show in the calendar. See the picture above.
- Status – defines whether the reservation is a
- draft (visible only for planners)
- proposal (visible only for planners and teachers) or
- published (also visible for students and in timetables)
- Subject - defines the name of the reservation
- Rooms and equipment – a room and/or equipment, select the name/code or use the search tools.
- External place, if classes will be held in some other place than the university premises - you may write the location here.
- Time (starts - ends) the start and end time of a single reservation
- Recurrence – you may set the reservation to repeat e.g. for a number of consecutive weeks.
- Reserved by – select the people (teachers) related to the reservation
- Reserved by = person responsible for the reservation (i.e. the person for whom the reservation is made - this is not the same as the creator of the reservation) although the field shows the creator as default.
- People added to this field have the full rights to edit the reservation.
- Participants - select other participants for the event
- The participants do not have the right to edit the reservation.
- Otherwise, people in the Reserved by and the Participants fields get the same information about the reservation.
- For further information about creating a reservation and participants, visit our FAQ pages. (Lisää linkki).
- Cost center – will be retrieved automatically, but you may fix it if the suggestion is wrong.
- Additional information will show from the link Add:
- External participants here you may add participants outside your own organisation (their email addresses). Be sure to write the addresses correctly:
- Fill out only one address per row in the form Mat Smith <mat.smith@example.com>
- N.B! When you add people to External participants - Add only one person in the Reserved by field. This person will show as a sender of the invitation to outsiders. If there are more than one person in the Reserved by field, the external participants may receive multiple invitations.
- Description/additional info – näkyy mm. lukkareissa, tässä voi kertoa lisätietoa varausta koskien.
- Number of participants
- Price type - Internal price/Common price
- Reservation created - the creation time of the reservation
- Reserver - reservation creator
- External participants here you may add participants outside your own organisation (their email addresses). Be sure to write the addresses correctly:
5. You may create a recurring event by selecting the Repeating reservation. This opens a new form that you need to fill out. 
6. Make the reservation and check possible conflicts from the Preview window. In the example below, there is conflict in Riida's calendar. You may remove the tick from that event and accept the rest of the reservations with the OK button.
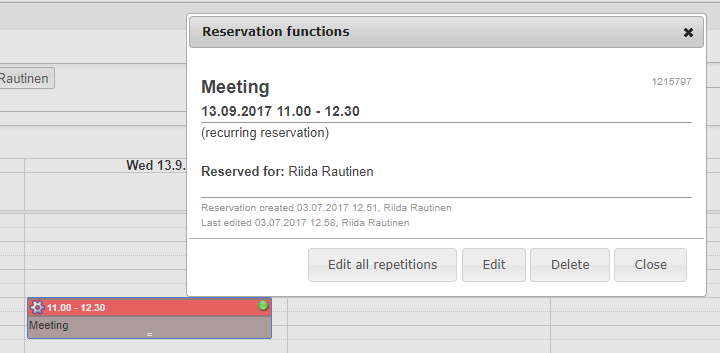
Edit the reservation
Select edit from the open reservation (see above) OR select the cog icon - edit from the calendar reservation. This way you may edit the reservation's fields as before when you were creating a new meeting time.
You may either delete or cancel a meeting time if
- you have rights to edit the reservation (You have created the reservation or you are included in the reservation).
the reservation is in the future (you cannot edit old reservations)
Deletion and cancellation are basically the same thing. The only difference is that you can send a message to students when you cancel the reservation.
Step-by-step instructions
- Select the cog icon on the reservation - Delete.
- Confirm deletion with the Delete button.
1. If you want to delete a reservation, you may click or tap it in the calendar view and select Delete from the opening window.
OR select the cog on the top right corner of the reservation and then Delete.

2. The system will ask you to confirm the deletion. If the reservation recurs, you may delete more than one reservation at a time.
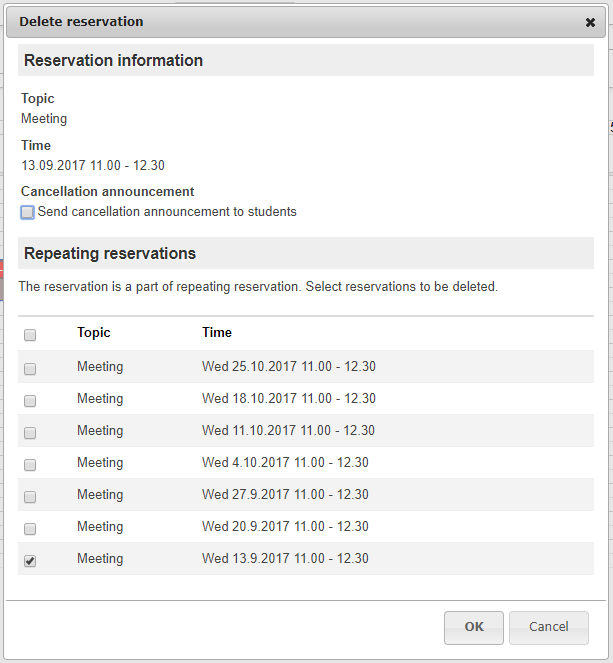
3. You may also notify students about the cancellation. When you tick the box, the form expands and message fields appear. Give the message a clear heading e.g. "Math classes cancelled today 1.1.2020" and in the message, you may add a more detailed explanation. This message will be sent to all recipients as a regular email.

Selecting the recipients:
- Implementation students = All the students registered on the implementation.
- Groups' students = The students of the groups included in the reservation (all reservation are not made for implementations).
- Kaikki (all) = Sum of both the above.
In addition, all people who are attached to the reservation will be notified, because some other person besides the teacher of the implementation may cancel it. Even if the teacher makes the cancellation, it is good for him/her to get a confirmation message of the cancellation.
Search free room
If you already know the date and time for which you want to book a room, do this:
- Select the date/time in the calendar e.g. April 7 at 10-12 (do not select a room just yet, but add yourself as a participant).
- On the reservation form, select the magnifying glass on the right-hand side of Rooms and equipment field. Select Find room and make sure that Room is available on selected time is chosen. Start the search with the Search button.
- Select one of the rooms on the list with the + button at the end of the row. N.B. If you don’t have the rights to book a room, you see a lock icon, N.B. students.
- Fill in the rest of the reservation form, as you would when making any other reservation, and Save the form.