Scanning
Scanning on a multifunction device — quick guide
Scanning is free.
- Login to the Canon multifunction device with your user ID or an RFID card.
- Press the Scan button, choose function, make the settings and press Start.
- The device sends your scan job to your Metropolia email address or cloud drive.
1. Touch the Canon card reader with your copy card.

2. Select the scanning job type:
Multi-page scan
Place a multi-page document text side up in the feed tray located on the top of the lid.
single-page scan
Place a single-page document under the lid text side down.
3. Select where you want to scan your work. Email or USB flash drive.
Scan to email
20Mb
Notice! When scanning to e-mail the file size is limited to 20MB.
Scan to your own email address
1. Select Scan.
2. Select Scan to My Email or Scan to My Email 1-sided.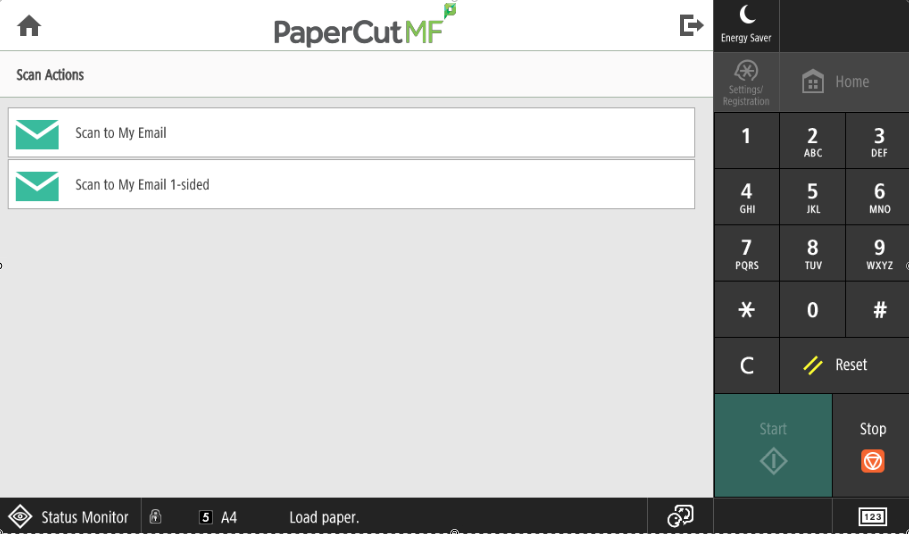
3. Press Start button.
4. Press Finish button.
Scan to a specific email address
1. Select Access Device.

2. Select Scan and Send.
3. Select New Destination.
4. Select E-Mail.
5. Type email address and press OK.
6. Press OK.
7. If you want to send your scans to more than one email address, you can do it by pressing Specify Destinations button and starting again from instruction three.
8. By pressing Start button you can now send scans to email.
9. Remember to log out of device.
Scan to USB flash drive
USB flash drive
USB flash drive's format must be fat/fat32.
1. Insert the USB flash drice to the USB port.
2. Select Access Device.
3. Press arrow to go forward.
4. Select Scan and Store.
5. Select Memory Media.
6. Select USB flash drive.
7. Select Skannaus.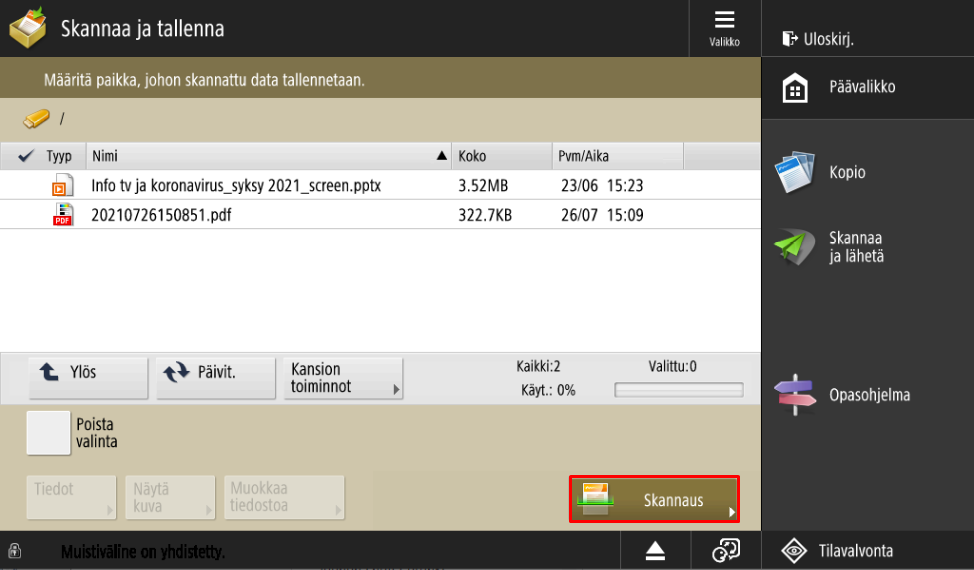
8. You can change scanning options here. (Colour, resolution, file format, etc)
9. Scan to USB flash drive by pressing START button.
10. Select Aloita tallennus.
11. USB flash drive now has scanned file. Remember to remove USB flash drive safely with Eject.
12. Select USB flash drive and press Poista button.
Text recognition (ocr) and scanning to Cloud service
Scanned document is saved to a cloud service in a PDF-file and the text can be copied to other applications.
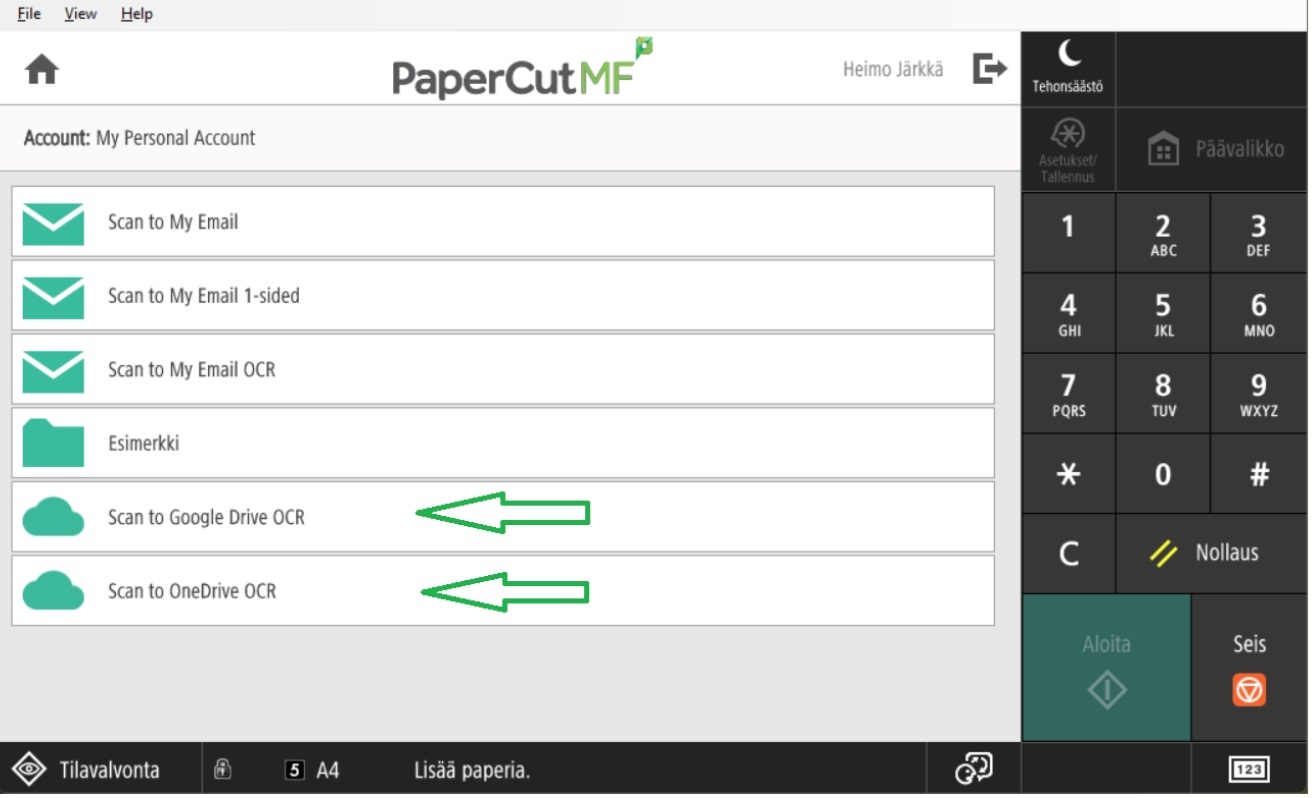
1. Log in to the multipurpose device and select Scan.

2. Select one of the following options
- Scan to Google Drive OCR
- Scan to OneDrive OCR
3. If you chose Scan to OneDrive OCR
- saving is done to OneDrive folder called Myfiles/Apps/Scans for papercut IMF
- filename seen on Filename
- default settings are Color PDF, 2-sided, A4-portrait and resolution is 300DPI
Start the scanning by pressing the Start-button.

4. Saving scans requires giving permission to folder Myfiles/Apps/Scans for papercut IMF
Accept the permission request from your email. Permission has to be given only once.

5. After giving permission for the app, you will receive another email that will confirm that saving was successful. The email has a link that takes you straight to your scanned document. You can also log into the application at onedrive.com.

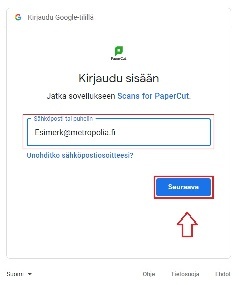
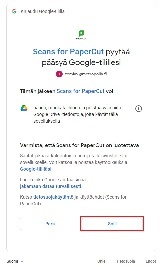
6. If you chose Scan to Google Drive OCR the steps are almost the same as before. You will receive an email to give permission for Google Drive. Press the link in the email to Login to Google Drive.

7. Log into your Google account in the form of username@metropolia.fi and press next. Then you have to log in with your metropolia username (short username without @)
8. Accept the terms by pressing agree.
9. Log into Google Drive at drive.google.com. Your files can be found in a folder named Scans for PaperCut MF.
