Study management has many different reports about people and their study rights at their disposal. The university may edit the default reports or create new ones on the report service of admin desktop.
You must log in to comment.
Step-by step instructions
Reports via Study right search
- On the Study management desktop, select Students -> Student administration.
- Enter search terms to search for students.
- Select a student or students to whom you wish to print reports by ticking the box in front of the student's name.
- Open Reports.

- Select the report type by ticking the box in front of the report name. (N.B! The available reports depend on your access rights. If the report type you need is missing, contact the system administrator.)
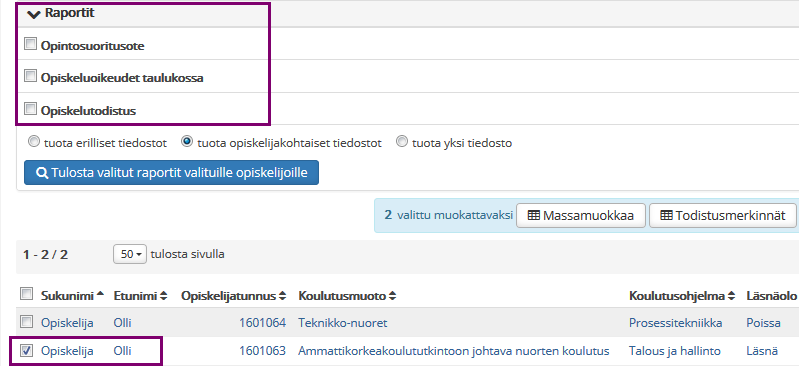
- Select the information you need on the report
- Select the form of the reports. You may select one of these options:
- Generate separate files = reports will be printed into separate files based on their report types
- Generate person specific files = reports will be printed into separate files for each student
- Generate one file = reports will be printed into one file
- Select Print selected reports to selected persons
- The system will save the reports on your computer from which you may view and print them
Reports from the top bar
- On the Study management desktop, select Reports from the top bar
- Select the report type (N.B! The available reports depend on your access rights. If the report type you need is missing, contact the system administrator.)

- Click Run report at the end of the report line -> Select the form of the report
- Fill in the information requested in the modal
- Select Run report
- The system will save the reports on your computer from which you may view and print them